The OpsRamp Gateway includes a built‑in proxy service that enables agent communication to be routed through the gateway. Agents deployed behind the gateway connect to the OpsRamp Cloud using the gateway proxy, instead of establishing direct outbound connections to the cloud.
The gateway proxy service listens on port 3128 and uses Squid as the proxy server.
Administrative configuration of the gateway, including proxy settings, is performed using the gateway console: https://<ipaddress>:5480.
By default, the gateway proxy service is in a stopped state.
Access Control Options
The gateway proxy service allows you to control how agents access the OpsRamp Cloud through the gateway. The service can be configured to run:
- Without restrictions – Allows agents to communicate through the gateway proxy without authentication or access controls.
- With restrictions – Restricts access based on user credentials, source IP address ranges, or allowed destination URLs or IP addresses.
Using restricted access helps prevent unauthorized usage and ensures that only approved agents and endpoints can communicate through the gateway.
Enable and disable proxy service
You can enable or disable the gateway proxy service using either the gateway web user interface or the serial (command-line) interface.
Enable/disable proxy from the Gateway Web UI
Log into the Gateway web UI at
https://<ipaddress>:5480.Click Proxy Configuration.
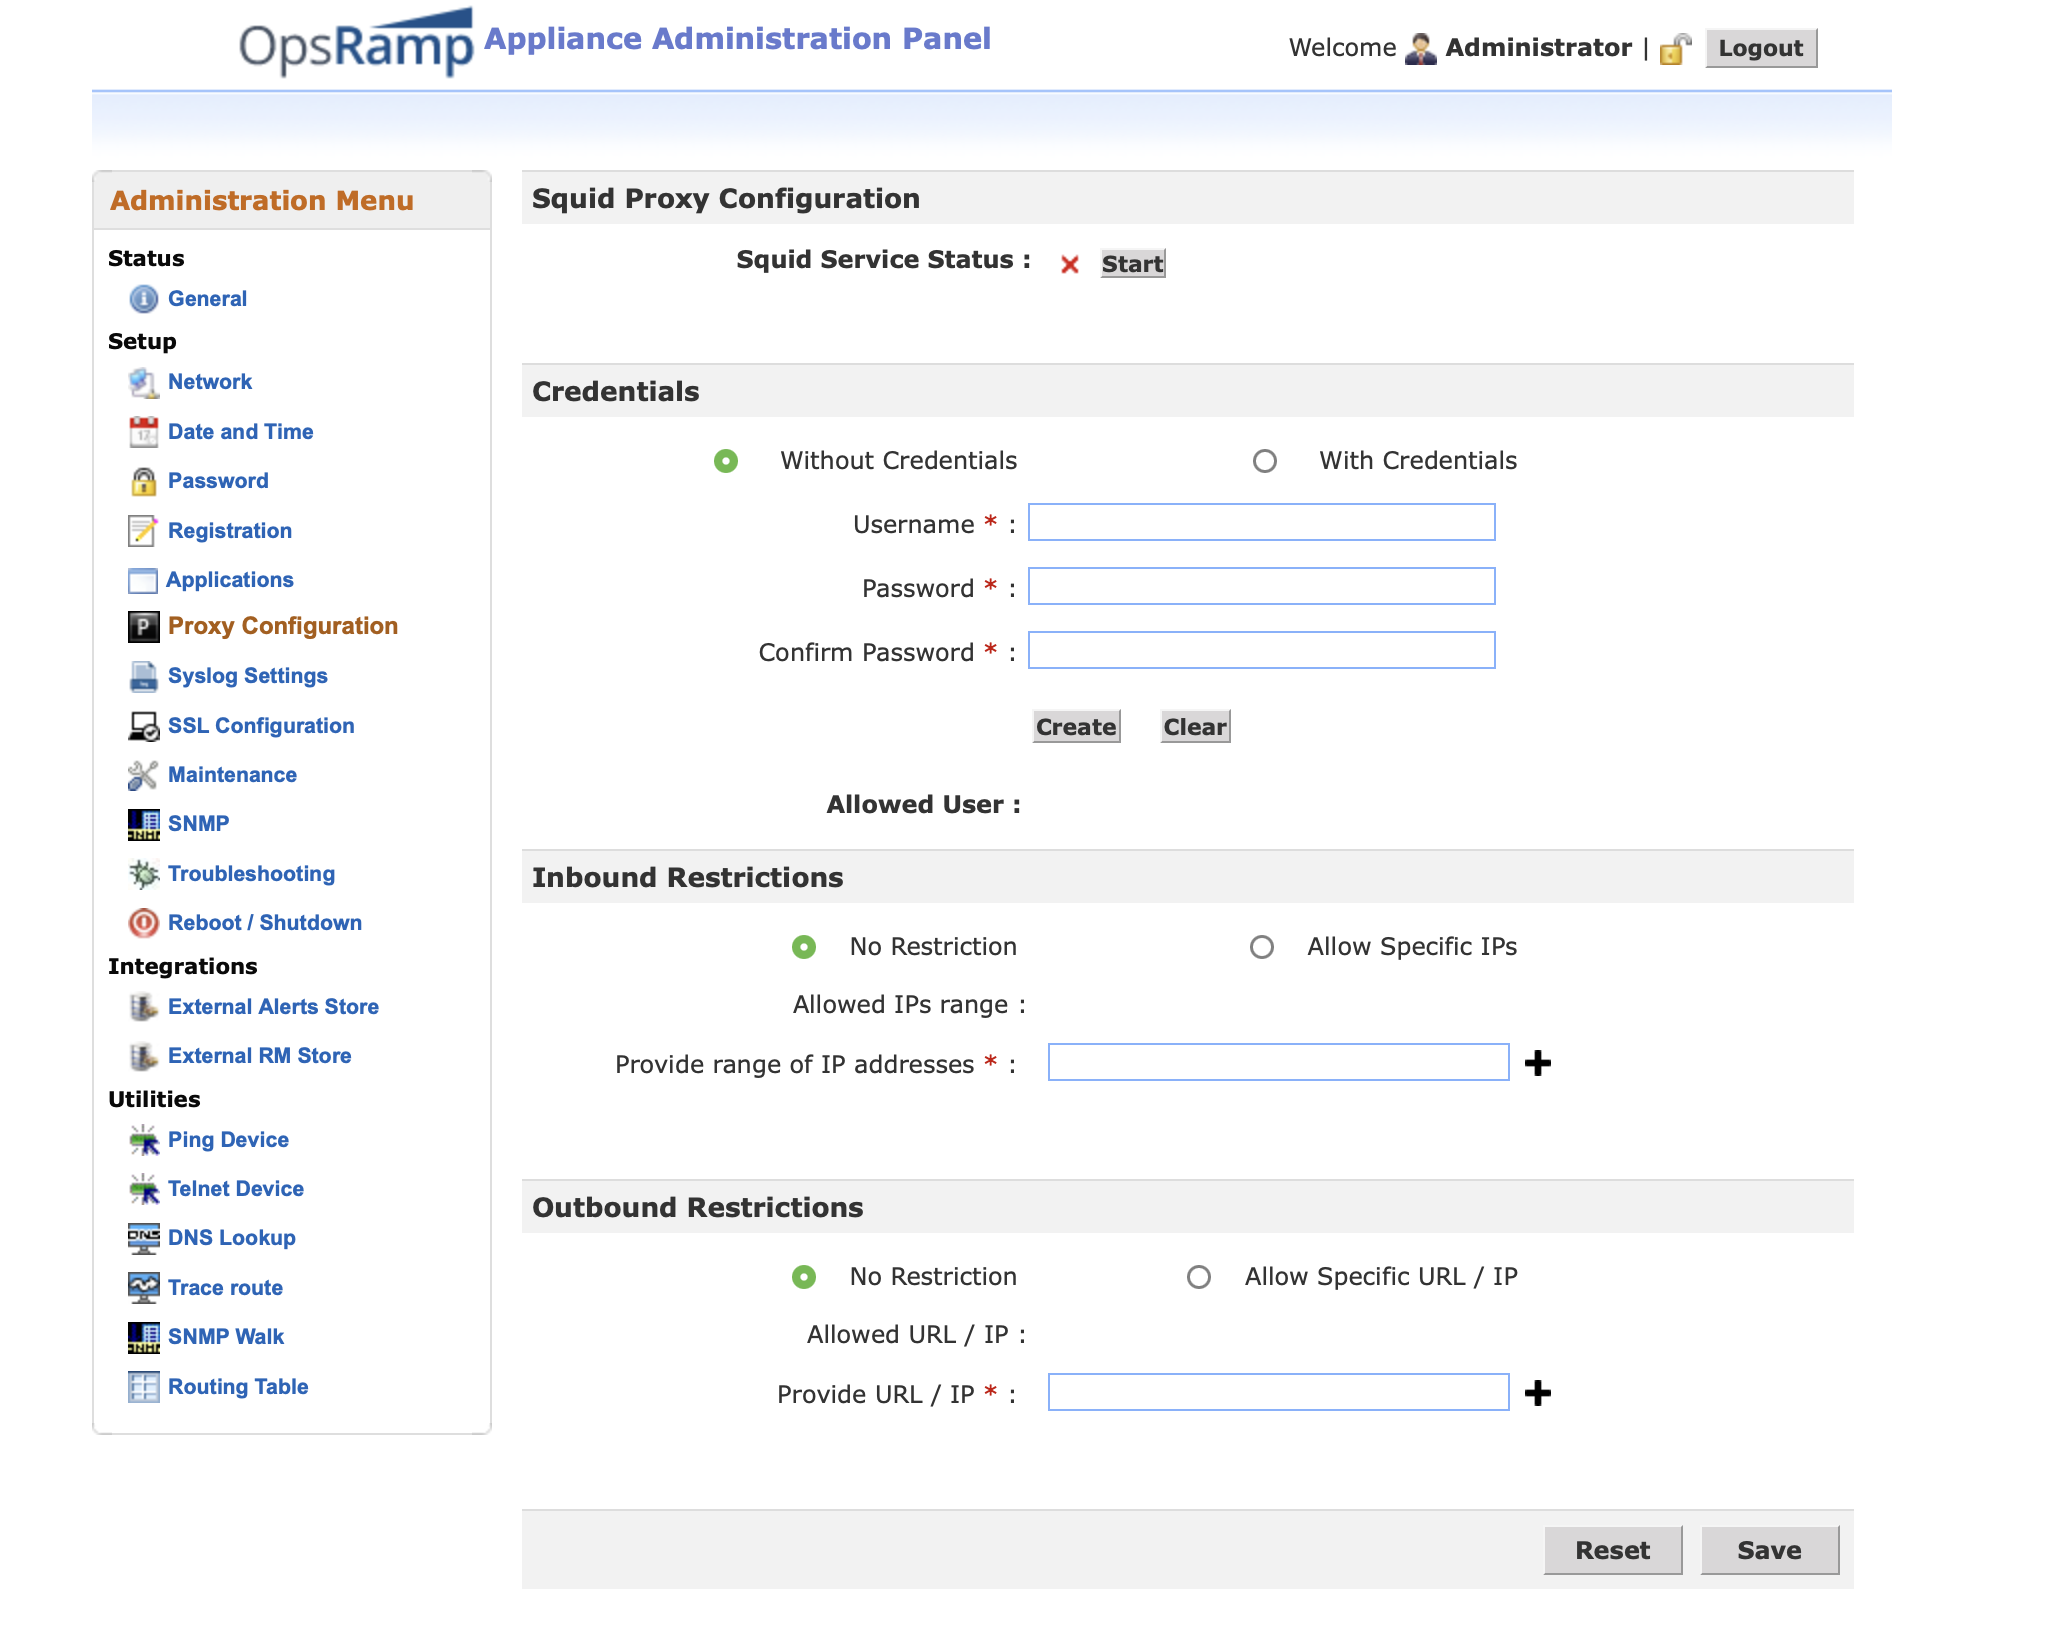
Click Stop to disable the proxy. Click Start to enable the Squid proxy service.
Enable/disable proxy from the command line
- Log in to the gateway CLI via SSH using your username and password.
- After logging into the gateway VM, launch the Administration Console using the following commands:
- For non‑root login : sudo su admin
- For root login: su admin
- Use Arrow keys to navigate to Squid Proxy and hit Enter
- Use Arrow keys to Enable or Disable the service and Save
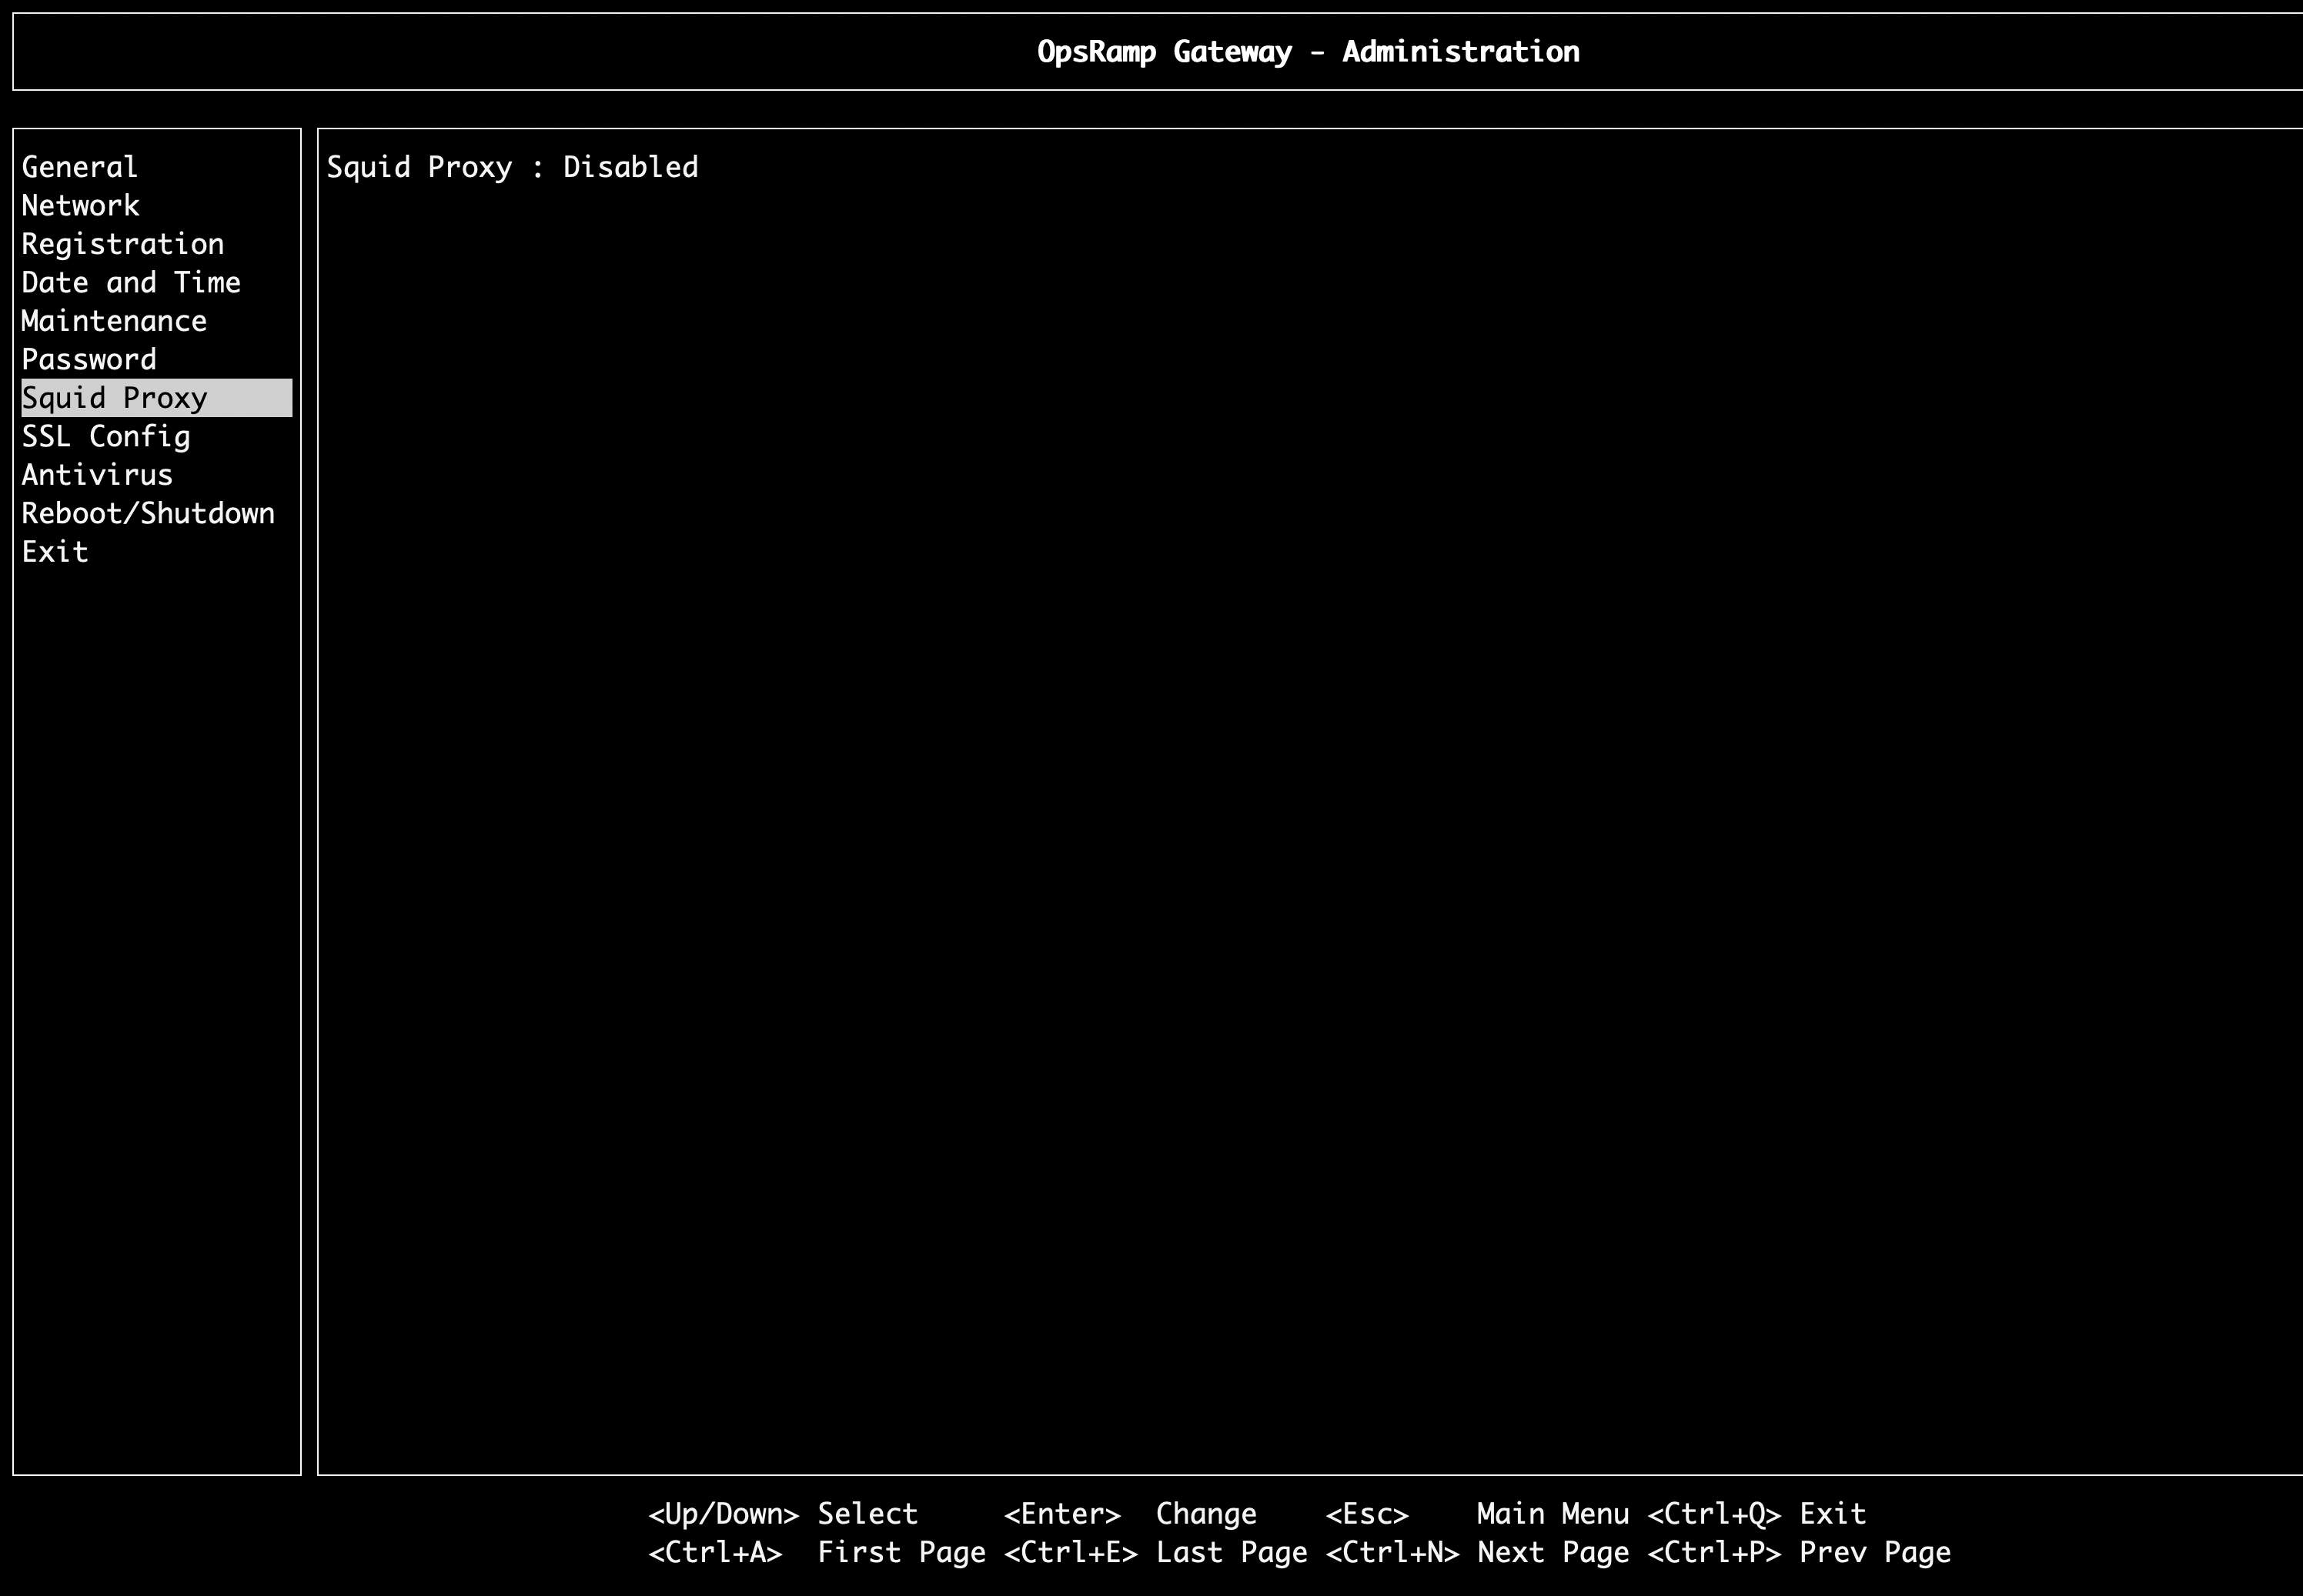
Disabling proxy services on the gateway impacts agents that are connecting using proxy.
Configure Proxy Service Without Restrictions:
When you run the proxy service without restrictions, any agent can communicate with the proxy without authentication or access limitations.
- Log into gateway web user interface: https://
:<5480> - From the left pane, click Proxy Configuration.
- Ensure the following options are selected in their respective sections:
- Credentials: Without Credentials
- Inbound Restrictions: No Restriction
- URL or IP Restriction: No Restriction
- Click Save to start the proxy service without restrictions.
Configure Proxy Service With Restrictions:
When configured with restrictions, the proxy service allows access only to authenticated users, specific IP addresses, or allowed outbound URLs/IPs. Steps:
- Log into the gateway web user interface:
https://<ipaddress>:5480 - From the left pane, click Proxy Configuration.
- Configure the following sections as needed:
- Credentials Configuration
- Select With Credentials to add a user.
- Enter the username and password, then click Create to add an authorized user.
- When authentication is enabled, agents can communicate through the proxy only using the user listed in the Allowed Users list. Only one user can be added.
- Inbound IP Restrictions
- Select Allow Specific IPs to restrict access to specific IP addresses or ranges.
- Enter the IP address or IP range in the Provide range of IP addresses field and click + to add it.
- The added IP addresses will appear in the Allowed IP Ranges list. Only those IPs will be allowed to access the proxy server.
- For example, entering
192.168.0.1/24allows IP addresses from192.168.0.1to192.168.0.254. To allow only a single IP address, specify that IP instead of a subnet.
- Outbound Restrictions
- Select Allow Specific URL/IP to restrict access to specific URLs or IP addresses.
- Enter the URL or IP address in the Provide URL/IP field and click + to add it.
- The added entries will appear in the Allowed URL/IP list. Only those URLs or IP addresses will be allowed to access through the proxy server.
- For example, entering
api.opsramp.comallows only that URL; all other URLs or IP addresses will be blocked.
- Click Save to apply all configured restrictions.
If you want to use the default gateway proxy configuration, click Reset.